
Low back pain, or lumbar back pain, is incredibly common. As such, you would think that there would be a few habitual ways to treat back pain. Unfortunately, this is not the case.
Since the back is such a complex area made up of bones, muscles, nerves, and tendons, there’s no easy way to tell what’s causing any given low back pain. There is, however, a list of widely-agreed-upon physical therapy exercises for lower back pain.
The following exercises are scientifically backed and designed to help relieve and prevent back pain. They are not a substitute for seeing a doctor, chiropractor, or physical therapist. If you’ve suffered an injury, such as a car accident or falling, you should see a medical professional before attempting any sort of exercise at home.
It’s also a good idea to keep in mind that none of these exercises should hurt. They may make you feel uncomfortable or put some strain on your muscles, but if an activity begins to hurt you, stop it at once.
For example, you may have a pinched nerve that’s causing your back pain. Some of the exercises below may not help fix your pinched nerve. If you can’t do any of these stretches without experiencing pain, you should consult a doctor, physical therapist, or chiropractor.
All of the exercises below are meant to be done with steady movements; no jerking or bouncing. To prevent injury, take it slow, steady, and only do what you feel comfortable with. This will help you realize the full benefits of physical therapy exercises for lower back pain.
Exercises For Increased Flexibility and Pain Reduction
Low back pain is often caused by poor flexibility in the hips, legs, and glutes. The following exercises can help you increase flexibility in those areas and possibly decrease instances of low back pain.
Hip Flexors

- Place one knee on the ground in a kneeling position.
- Bring the arm of that same side up straight and slightly back.
- This will cause your hips and middle back to extend.
- Hold for 30 seconds and release.
- Perform 3 times each side to stretch hip flexors.
Hip Adductor

- While standing, place the inside of your ankle on a table, bed, or tall chair.
- Bring the opposite arm straight up next to your ear as if you’re reaching for the ceiling.
- Lean into the stretching leg and hold for 20 to 30 seconds and release.
- Repeat on each side 3 times.
Hamstring

- Stand facing a table, bed, or tall chair.
- Place the back of your heel on the surface so that your leg is straight.
- Lean forward at the hips to stretch your hamstring.
- Hold for 30 seconds and release.
- Repeat on each side 3 times.
Glute

- Stand facing a table, bed, or tall chair.
- Place the outside of your heel and knee on the surface so that your leg is at a 90-degree angle.
- Lean forward at the hips while keeping your back straight.
- Hold for 30 seconds and release.
- Repeat on each side 3 times.
Cat and Cow

- Begin on all fours with your hips over your knees, your shoulders over your hands, and your head neutral.
- Breathe in while bringing your eyes up to look toward the ceiling and bending your spine toward the floor.
- Breath out while bending your spine toward the ceiling and tucking your chin to your chest.
- Repeat 15 to 20 times.
Supine Knee Side-To-Side
- Begin lying on your back with your feet pulled toward your hips and your knees up.
- Twist your knees gently to one side and stop when you feel your hips start to come off the table or mat. Keep your upper body in position.
- Bring your knees back the other way and do the same thing on the other side.
- Repeat 25 to 30 times.
Figure 4
- Lying on your back with your knees up, place one ankle on the other knee, forming a figure 4 with your legs.
- Press down on the leg you crossed. You should feel the stretch in your hip.
- Hold for 20 to 30 seconds before releasing.
- Perform 3 times on each side.
Knee to Chest
https://www.verywellhealth.com/knees-to-chest-exercise-296870
- Lying on your back with your knees up, grab the back of one knee with both hands and bring it to your chest (or as far as you can toward your chest).
- Hold the stretch for 20 to 30 seconds before releasing.
- Switch sides and perform a total of 3 times each side.
Child’s Pose

This simple stretch is ideal for opening up your lower back and bringing quick pain relief.
- Kneel on the floor and sit back on your heels.
- Bend forward with your arms extended in front of you until your forehead is resting on the floor.
- Hold this position for 30 seconds, or as long as you feel relief from the stretch.
Exercises to Strengthen and Relieve Pain
Core and back strength is incredibly important when it comes to low back pain. The following exercises are designed to help you strengthen these areas and ease the pain in your back. We’ll begin with the easy ones and move on to the more difficult ones.
Note: Most of these exercises require that you engage your ab muscles. The proper form calls for a drawing-in of the muscles, instead of a bulging-out. Your lower stomach should flatten in a little bit. If you’re pushing your abs out, you’re likely over-flexing.
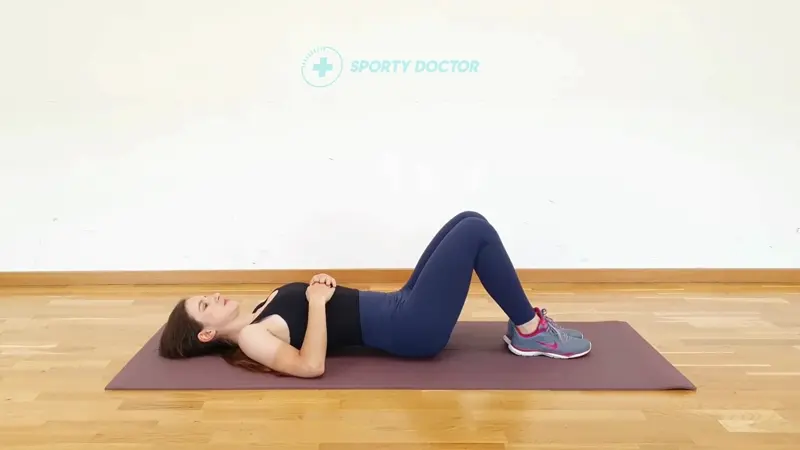
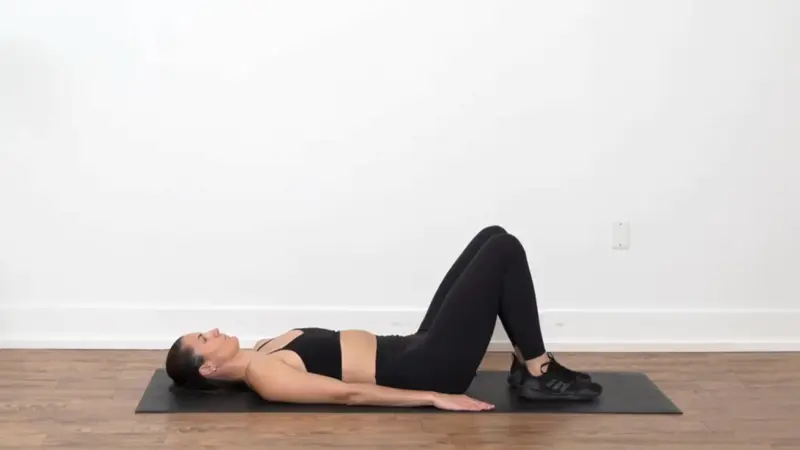
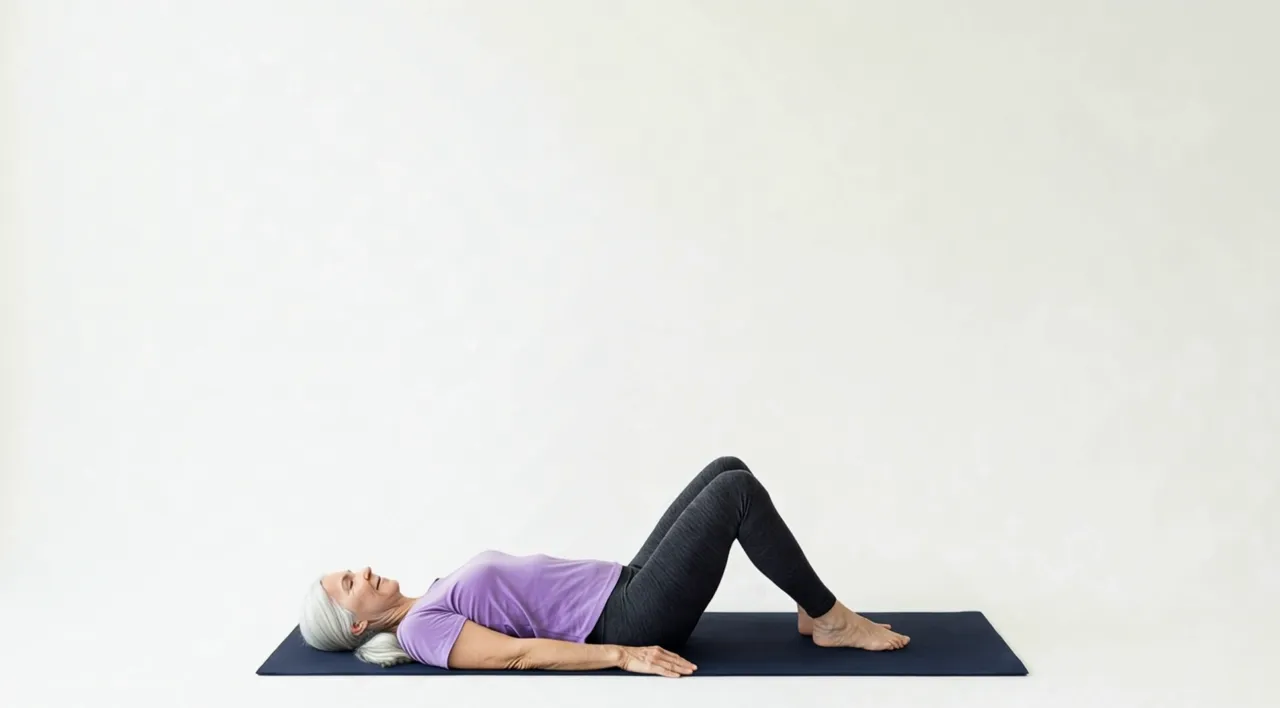
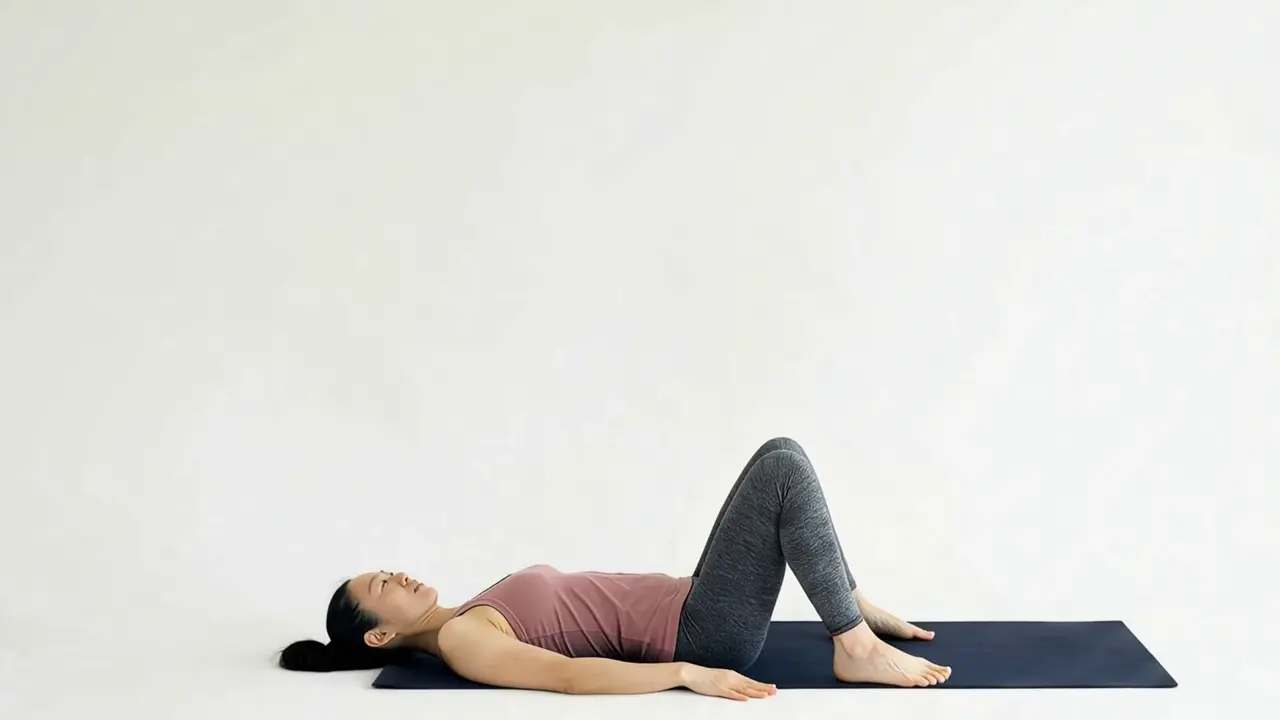
Supine Core Strengthening

https://myhealth.alberta.ca/Health/Pages/conditions.aspx?hwid=zm6019&lang=en-ca
- Lying on your back on a mat or the floor, bring your knees up and your feet comfortably away from your hips.
- In this position, engage your ab muscles and push your low back down to the mat or floor.
- Repeat 15 to 20 times.
Supine Core Strengthening with Leg Draw

- Lying on your back with your knees drawn up and feet flat, engage your ab muscles.
- Maintaining the engagement, lift one knee toward your chest without using your hands.
- Keep your abs engaged until you put your foot back in the starting position.
- Repeat 15 to 20 times on each leg.
Press Ups

- Lying flat on your stomach, bring your elbows to your sides and place your hands just above your shoulders. Your legs should be fully extended, your hips flush with the mat or floor.
- Pull your shoulder blades back and in while you lift your chest off the ground.
- Hold for 5 seconds, making sure that your legs and hips stay in contact with the floor or mat. Your neck should stay long and in-line with your upper spine the entire time.
- Slowly return your chest to the ground.
- Repeat 15 to 20 times.
Prone Cobras

- Lying flat on your stomach with your legs extended, place your arms flush at your sides, hands pressed to legs.
- Without using your hands to help, lift your chest off the ground, keeping your neck in-line and long. Pull your shoulder blades in and flex your glutes throughout.
- Hold for 3 to 5 seconds before slowly lowering your upper body back to the mat or floor.
- Repeat 10 to 15 times.
Bridge
- Begin lying on a mat of the floor with your knees up and your feet flat a comfortable space away from your hips.
- Keeping your arms on the floor, lift your hips off the ground to make a ‘bridge’. From your chest to your knees should be a straight line.
- Hold for 5 to 10 seconds, keeping your shoulder blades and neck on the ground, your glutes and abs engaged the whole time.
- Slowly lower your hips to the ground.
- Repeat 15 to 20 times.
Note: To make his exercise more difficult, cross your arms over your chest so you can’t use them to help you.
Side Bridge

- Start by lying on your side with one elbow underneath you.
- Rise up onto your elbow and forearm.
- Bring your legs off the ground so you’re only resting on your forearm and the side of one foot.
- Hold for 15 seconds before easing yourself back down. Increase the time you hold as you feel comfortable.
- Repeat 10 to 15 times on each side.
Bird Dog

- Begin on your hands and knees, shoulders over hands and hips over knees.
- Simultaneously stretch one arm and the opposite leg straight out. (Left arm, right leg, or vice-versa.)
- Hold for 10 to 15 seconds before bringing your limbs slowly back down.
- Repeat 15 to 20 times, alternating each time.
Prone Bridge

- Begin by laying on your stomach, your elbows underneath you and your toes ready to take your weight.
- Lift yourself to rest on your toes and elbows. Your core should be engaged and your body straight. Keep your hips and chest in line and parallel to the floor.
- Hold for 15 seconds before easing yourself back down. Increase the time you hold as you feel comfortable. You can hold for up to 90 seconds as you progress.
Useful Resource: Best Back Exercises With Resistance Band
Tips for Avoiding Back Pain
The exercises above can help you relieve low back and lumbar pain. But for best results, you can practice habits that not only help you avoid back pain, but also keep you generally healthy and fit.
- Regular exercise can help you even when you don’t have back pain, particularly if you aren’t active. Even 30 minutes, 5 times a week can work wonders for your body and your back.
- Proper posture can do much to prevent and relieve back pain. Make a point to become aware of your posture throughout the day. You may also consider getting a back brace to help you keep proper form your day.
- Healthy eating, believe it or not, can reduce chronic inflammation and help your back pain. Some anti-inflammatory foods include berries, sweet potatoes, beets, olive oil, carrots, and salmon.
- Weight loss can also help prevent back pain. The more excess weight you carry, the more pressure it puts on your back.
Back pain is pretty common, and most of the time it goes away without surgery or too much effort. Sometimes there’s nothing you can do to avoid back pain, but a healthy lifestyle is one of the best ways to live a life free of back pain.